SITE URL ADDRESS CHANGE: As of June 1, 2022 use https://krissmotors.com/FFR to reach this Build Manual. The buildmanual.tech address has been discontinued. See also KrissMotors.com.
If you dream of building, owning, and driving an AC Cobra, you’ve come to the right place!
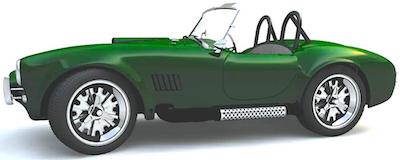
FFR Roadster CAD drawing
BUILD MANUAL details the construction of an all-new — that is, non-donor — Factory Five Racing (FFR) Roadster, generally referred to as the Mk3 or Mk4 1 as well as the 289 USRRC period-correct version and the MK4 Challenge racer.
The FFR Roadster is a replica of the AC Cobra: see also Legacy of the FFR Roadster.
BUILD MANUAL content preview
BUILD MANUAL covers 12 major topics in clearly written how-to sections illustrated with over 650 photos, drawings, and diagrams. Click on the 12 tabs above for a overview of our detailed instructions and technical assistance. Full access requires a membership pass.
Getting Started
Initial decisions
✔︎ Understand the AC Cobra legacy (development history, race results, vintage car photos)
✔︎ Is this the dream car you really want?
✔︎ What is a replica?
✔︎ Build one or buy one?
✔︎ Kit car manufacturer comparison: picking the right primary vendor
✔︎ Build the FFR Mk3, Mk4, 289 USRRC, or Challenge kit?
Project planning
✔︎ Articulate a build objective
✔︎ Understand rear suspension alternatives
✔︎ Define specifications and explore customizations
✔︎ Review state registration requirements
✔︎ What about insurance coverage?
✔︎ Establish a realistic build budget
✔︎ Select wheels and tires
✔︎ Consider customizations and special parts
✔︎ Select vendors and place orders
✔︎ Record keeping: orders and inventory
✔︎ Learn technical terminology
Work area setup
✔︎ How to prepare your workspace
✔︎ Comprehensive part labeling
✔︎ Procure tools and supplies
✔︎ Attend a FFR-oriented build school
✔︎ Construct engine block holder and body buck
Basic preparation
Kit staging
✔︎ Receive FFR kits, wheels and tires, and other parts
✔︎ Unpack, inventory and validate vehicle ID
✔︎ Inspect and remove body
✔︎ Chassis weep holes
✔︎ Crate engine setup
Aluminum fabrication
✔︎ Remove emergency brake bracket and fill cutout
✔︎ Fabricate custom transmission side tunnel fresh air vents
✔︎ Position custom fuel pump and sending unit access covers in trunk area
✔︎ Breeze radiator shroud
✔︎ Test fit Breeze battery box in engine bay
✔︎ Foot box removable cover
✔︎ Panel preparation
✔︎ Screw holes for seat belt bezels
✔︎ Anodize or powder coat all aluminum
Crate engine readiness
✔︎ Crate engine delivery and setup
✔︎ Flywheel dowel pins
✔︎ Swap oil pan
✔︎ Engine mounts
✔︎ Intake manifold
✔︎ Thermostat including heater bypass
✔︎ Clutch including clutch fork and release bearing
✔︎ Transmission
Suspensions
Front suspension
✔︎ IFS overview
✔︎ Lower control arm (LCA)
✔︎ Upper control arm (UCA)
✔︎ Spindle and bracket
✔︎ Hub and brakes
✔︎ Steering rack
✔︎ Preliminary front alignment
✔︎ Koni front shocks
Rear suspension
✔︎ Understand rear suspension alternatives ❗ 240-258
✔︎ Differential
✔︎ Rear axle and CV joints
✔︎ Control arms, spindle, and rotor
✔︎ Koni rear shocks
✔︎ Fabricate and install driveshaft safety loop
✔︎ Preliminary rear alignment
Mechanical controls
Pedals
✔︎ Install driver side (DS) front foot box aluminum panel
✔︎ Foot box panel assembly
✔︎ Pedal box
✔︎ Install firewall aluminum panel
✔︎ Accelerator pedal
✔︎ Upgrading pedals
✔︎ Upgrading brake pads
Steering
✔︎ Steering system including steering shaft and steering wheel
✔︎ Modify DS foo tbox side panel for hose and harness access
Brakes
✔︎ Brake master cylinders
✔︎ Wilwood Balance Bar
✔︎ Remote brake fluid reservoirs
✔︎ Brake lines
✔︎ Emergency brake cables
✔︎ Emergency handbrake
✔︎ Bleed brakes
Electrical system
Automotive electricity
✔︎ Understanding switches, relays, fuses and diodes
✔︎ Wire specifications
✔︎ Dash overview
✔︎ Wiring overview
✔︎ Wiring connections
Mounted components
✔︎ Ron Francis/FFR fuse box
✔︎ Solenoid
✔︎ Battery switch
✔︎ Firewall attachments
✔︎ Breeze battery box installation with chassis grounds
Dash fabrication
✔︎ Dash construction
✔︎ Dash wiring
✔︎ Gauge wiring
✔︎ Russ Thompson turn signal
✔︎ EFI computer, underdash filler panel, and related components
✔︎ Gauge calibration patch panel
Wiring integration
✔︎ Multiple electrical grounds
✔︎ Terminal blocks
✔︎ WeatherPack connectors
✔︎ Integrate harnesses (Ron Francis and MassFlo EFI)
✔︎ FFR fuse box modifications
✔︎ FFR and EFI fuse box wiring
✔︎ Headlight switch connections
✔︎ Ignition switch connections
✔︎ Neutral safety switch
✔︎ Sending units
✔︎ EFI 9-pin connections
✔︎ Rear harness
✔︎ Front harness
✔︎ EFI harness
✔︎ Alternator wiring
✔︎ Sending units
Component diagrams
✔︎ Horns
✔︎ Radiator fan
✔︎ Fuel pump
✔︎ Wipers
Fuel system
Fuel delivery
✔︎ Install gas tank
✔︎ Install fuel lines and filter
✔︎ Breeze EFI bypass regulator
Electronic fuel injection
✔︎ Mass-Flo fuel components
✔︎ Distributor
✔︎ EFI fuel lines
✔︎ EFI harness
Engine bay
Engine installation
✔︎ Install engine bay panels prior to engine installation
✔︎ Engine drop-in
✔︎ Drive shaft
✔︎ Attach chassis grounds to engine block and cylinder head
Engine bay components
✔︎ Alternator
✔︎ Starter
✔︎ Wiper motor
Cooling system
✔︎ Assemble radiator-shroud-fan unit
✔︎ Mount radiator
✔︎ Pressurized coolant fill port
✔︎ Connect radiator hoses
Exhaust system
✔︎ Exhaust headers and oxygen sensors
✔︎ Exhaust side pipes, see also engine mount adjustment
✔︎ Heat shields
First engine start & test drive
Cockpit construction
✔︎ Cockpit overview
✔︎ Clutch cable
✔︎ Transmission tunnel
✔︎ Install transmission tunnel vents and cockpit floor panels
✔︎ Modify tunnel cover for emergency brake and shifter assembly
✔︎ Trial fit seats
Go cart stage
✔︎ Install remaining trunk panels
✔︎ Install fire extinguisher
✔︎ Install remaining cockpit panels
✔︎ Trunk license plate wiring
✔︎ Drill roll bars
✔︎ Preliminary seat belt installation
Engine start and test drive
✔︎ First engine start
✔︎ Distributor timing
✔︎ Run diagnostic codes
✔︎ Professional alignment
✔︎ Go cart test drive
Body completion
Gel coat prerequisites
✔︎ Hood hinge preparation
✔︎ Radiator cowling
✔︎ Trunk hinge preparation
✔︎ Foot box gap fills
✔︎ Prepare rear and front splash guards (elephant ears)
✔︎ Foam tape and rubber seals on chassis, aluminum panels
✔︎ Exterior front and rear light wiring
✔︎ Mount gel coat body
Body-on components
✔︎ Check gauge and dash fitment
✔︎ Connect fuel filler neck
✔︎ Windshield install
✔︎ Adjust roll bar cutouts and install
✔︎ Lucas wipers
✔︎ Pre-fit doors and bottom trim
✔︎ Prepare trunk lid
✔︎ Pre-fit hood
✔︎ Exhaust side pipes
✔︎ Exhaust heat shields
✔︎ Gauge calibration
✔︎ Gel coat test drive
Shell preparation
✔︎ Paint plan, including options, schedule and budget
✔︎ Fiberglass shaping
✔︎ Hood scoop
✔︎ Paint selection
✔︎ Paint process
✔︎ Clear coating
Interior and exterior finish
Trim and fixtures
✔︎ Emergency brake boot
✔︎ Shifter knob, rubber boot, and bezel
✔︎ Safety harness
✔︎ Seats
Carpet and insulation
✔︎ Heat and vibration protection
✔︎ Carpet overview
✔︎ Driver foot box finish
✔︎ Passenger foot box finish
✔︎ Passenger side lock box
✔︎ Transmission tunnel finish
✔︎ Rear cockpit wall finish
✔︎ Trunk floor gap
Exterior trim
✔︎ Painted body mount
✔︎ Trunk lid mount
✔︎ Side louvers
✔︎ Body badges
✔︎ Fuel neck and gas cap
✔︎ Wind wings
✔︎ Final hood and latch
✔︎ Side and rear view mirrors
✔︎ Headlight assembly
✔︎ Over-rider bumpers
✔︎ Wiper arms and blades
✔︎ Fender spats
Graduation
Driving
✔︎ Headlamp adjustment
✔︎ First time wash and wax
✔︎ Ear protection
✔︎ Driving shoes
✔︎ Road handling adjustments
✔︎ Maintenance checklist
✔︎ Engine oil analysis
✔︎ Driving technique
Library
✔︎ PDF documents, FFR supplemental instructions
✔︎ Common automotive abbreviations
✔︎ Vendors, parts, tools, and more
INSTANT FULL ACCESS
For immediate access to all BUILD MANUAL content, purchase a one-year ($25) Premium Content membership pass. If you already have a membership pass, just LOG IN now.
If your pass from the old Mk3Build or Mk4Build sites has expired, please re-register and purchase a new one. For more information, read our Terms of Use and Build Manual overview.