Topics
Frame
In general our 1972 XJ6 body and chassis survived in excellent condition. The paint isn’t original, but the repaint color match is perfect. There are a few surface dings and scratches, but nothing that requires any metal work on the body itself. However, the chassis has several vulnerable points where moisture tends to accumulate over long periods.
Radiator crossmember
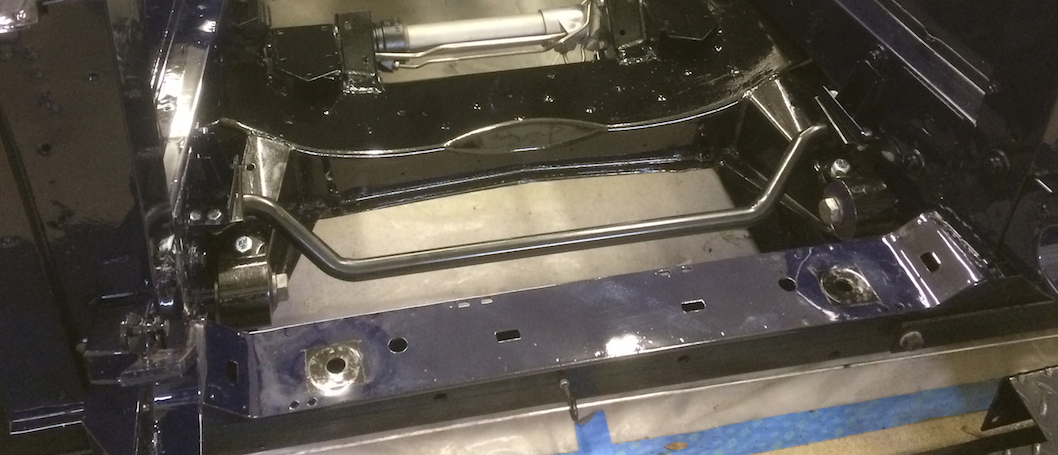
The radiator rests on a crossmember that spans between the left and right chassis rails. When rain hits the grille it trickles down through the radiator mesh and puddles at the base of the radiator mount. The two radiator mount holes are not waterproof, so moisture eventually drips down into the hollow crossmember. In our case, rust formed along this bottom portion and also damaged part of the lower valance that covers the crossmember.
Mitigation
Happily, the lower crossmember part 12101 (as well as the lower valance piece) remains in stock, so the rusted area was cut out and a new metal piece welded in.
Sheet metal
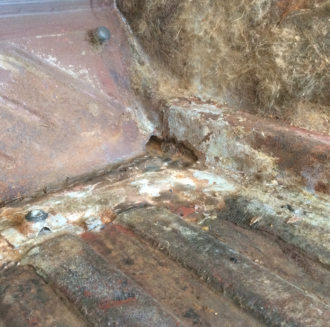
Several pieces show pin hole corrosion including the floor pans at the rocker panel “pinch” and the front joins around the toe boards.
Rocker panels
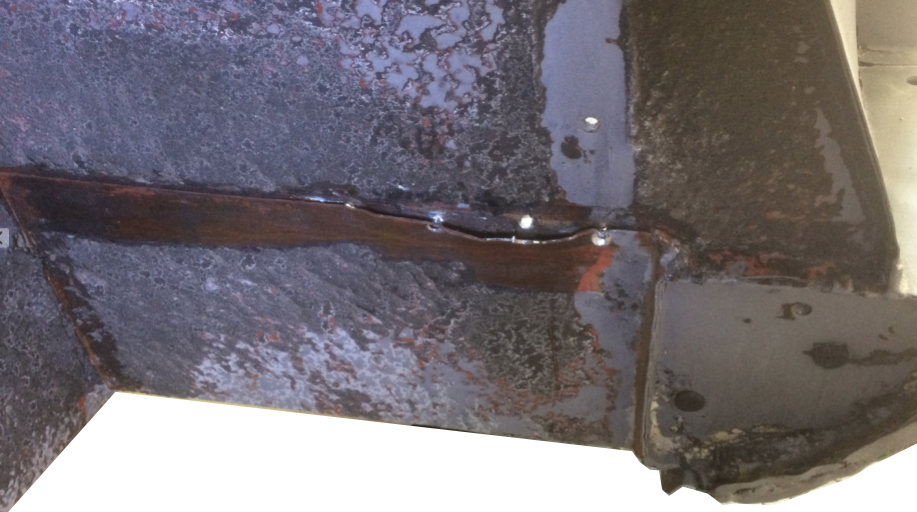
After blasting we discovered that both rocker panels had been previously replaced using a long exterior TIG weld to attach a new lower piece. On the inside, rectangular patch panels were spot welded to the original floor pans. Significant corroded metal along the “pinch” seam means the toe boards and floor pans must now be replaced, so a fabricated interior rocker panel piece will be required as well (rocker panel replacement parts are not readily available).
Mitigation
The XJ6 unibody structure must be repaired with patches that can only approximate the original metal contours. The old repair to the rocker panels further limits what can be done since the old patch must be cut out leaving less of the OEM metal body.
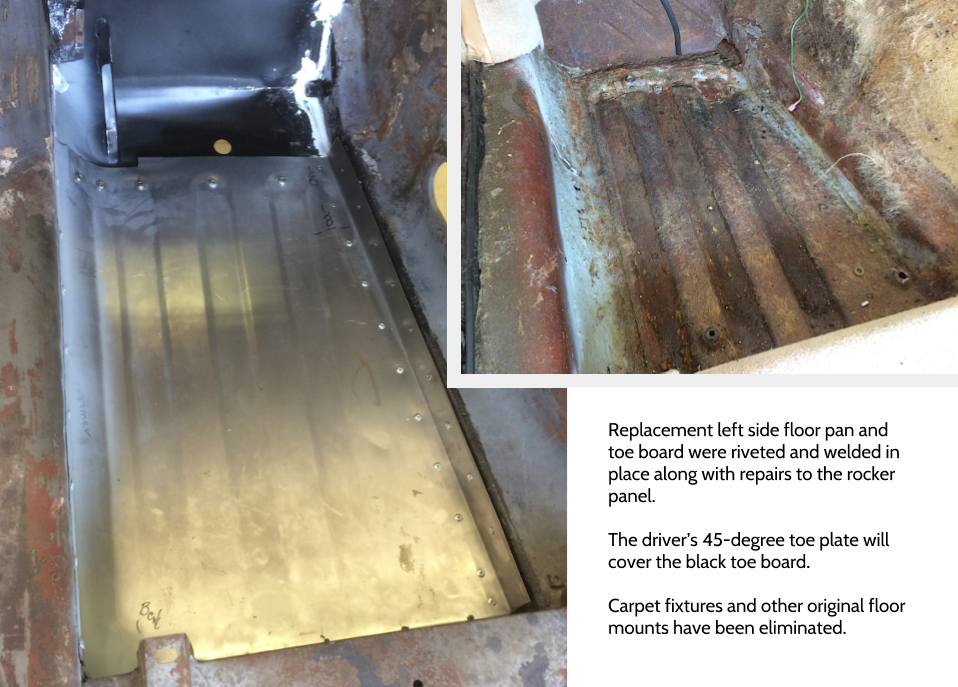
A long 18 ga rocker patch panel is joined at the rocker “pinch” as well as high on the inside rocker surface. The floor pan will join at a different point than the original unibody, but the new design should be at least as strong.
Jaguar unibody construction only used welds to attach sheet metal pieces since this is quick and inexpensive in an assembly line setting.
Given the location of metal patch repairs, the new fabricated pieces are fastened at the top and bottom with special structural high strength rivets that leave the mandrel in place — generally known as Q rivets — while the end points are welded to existing metal. Bostik 1100 FS, an adhesive sealant, helps make the riveted seams water and rattle proof. Seams are filled with 3M™ All-Around Autobody Sealant (08500), a white water-based synthetic elastomer that keeps out moisture. Finally, the entire surface is coated with 3M™ Professional Grade Rubberized Undercoating, a black asphalt-based spray-on that provides sound deadening and anti-rust protection.
Rocker panel end cap
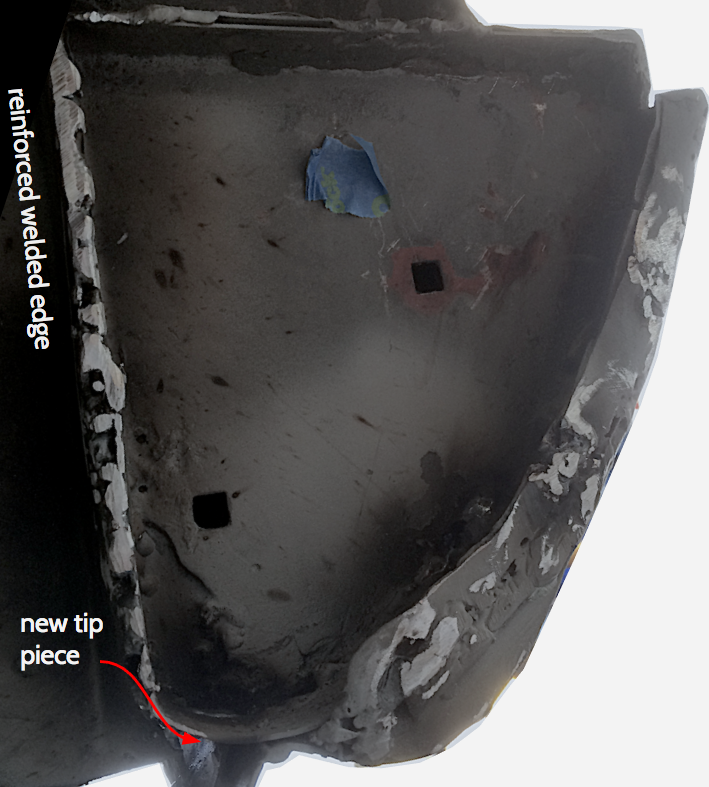
The rocker panel end caps displayed significant erosion after blasting removed bondo filler.
Mitigation
A small metal tip strip was welded in to provide structural support, then seam sealant and 3M rubberized undercoating completed the repair.
Toe board
So named because of its location just in front of the driver — or passenger — toes (when one’s leg is fully extended towards the firewall), the toe board structurally secures the leading edge of the floor pan and also provides a reinforced jacking point.
Mitigation
Floor pans
On wet days, moisture from the foot pedals puddles at the front of the floor pan and finds its way into the toe board enclosure. As debris fills the space and blocks the drain hole, rusting begins in earnest. This damages both the toe board as well as the edge of the floor pan. Fortunately, these parts are still available.
There is metal damage along both right and left weld lines where the floor pans meet the toe box. Poor jacking technique (that is, lifting the car up without regard to the jacking points!) dimpled the front of both pans as well.
Mitigation
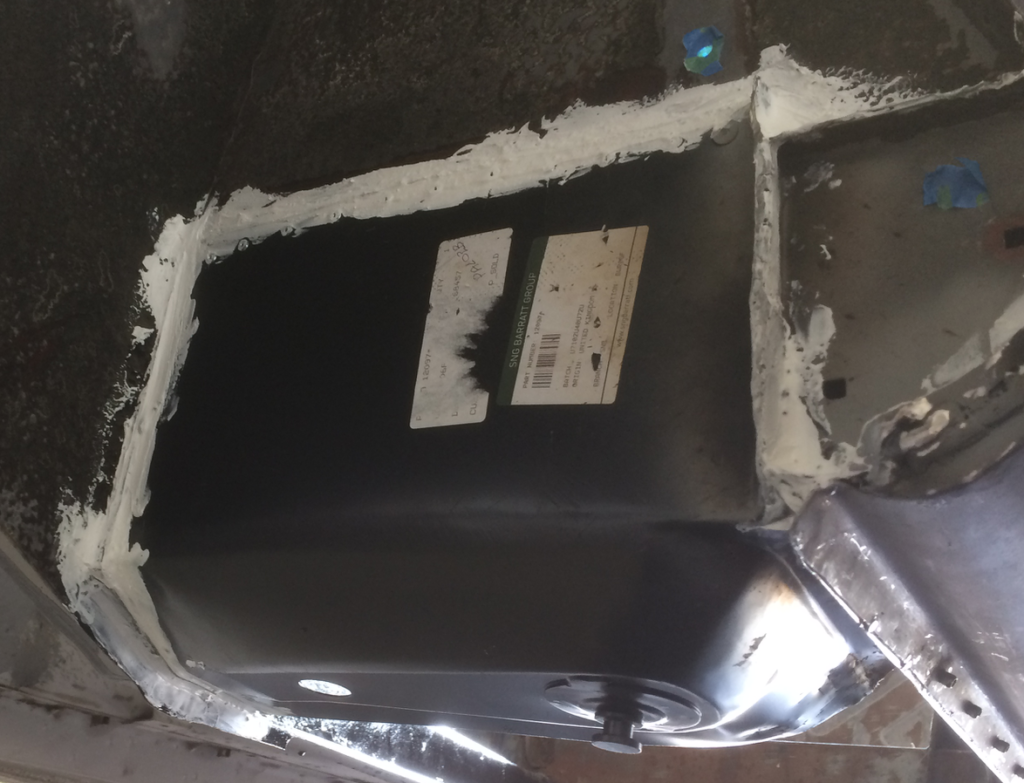
To fix everything, both left and right pans and the driver’s toe board were cut out and new parts welded\riveted in.
Heater core corrosion
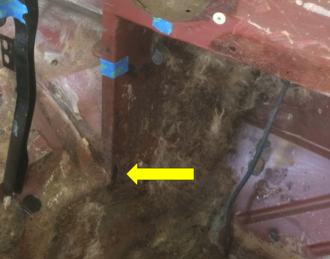
Jaguar tucked the heater core into a shelf just above the beginning of the transmission tunnel. Condensation dripped down the support leg and seeped into the carpet and jute backing where the moisture eventually eroded part of the tunnel sheet metal.
Damage is non-structural; the rust holes will be patched with riveted sheet metal for a watertight seal. (The new climate control system will not place the heater core in the same location.)
Mitigation
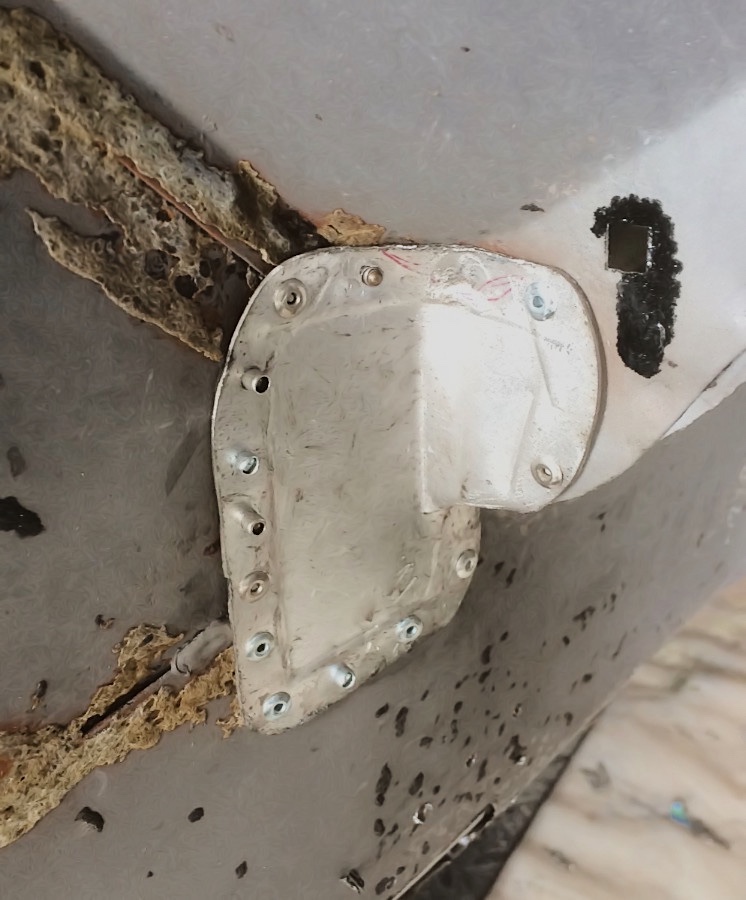
The corner damage is small in area but a little tricky to cover adequately. A piece of 16 gauge metal was worked into the space and then riveted securely.
A larger patch was required on the passenger side just above the floor pan which was also caused by heater core moisture. Prior to final riveting, the sheet metal is held in place with cleco fasteners to adjust the fit.
Front trailing stone guards
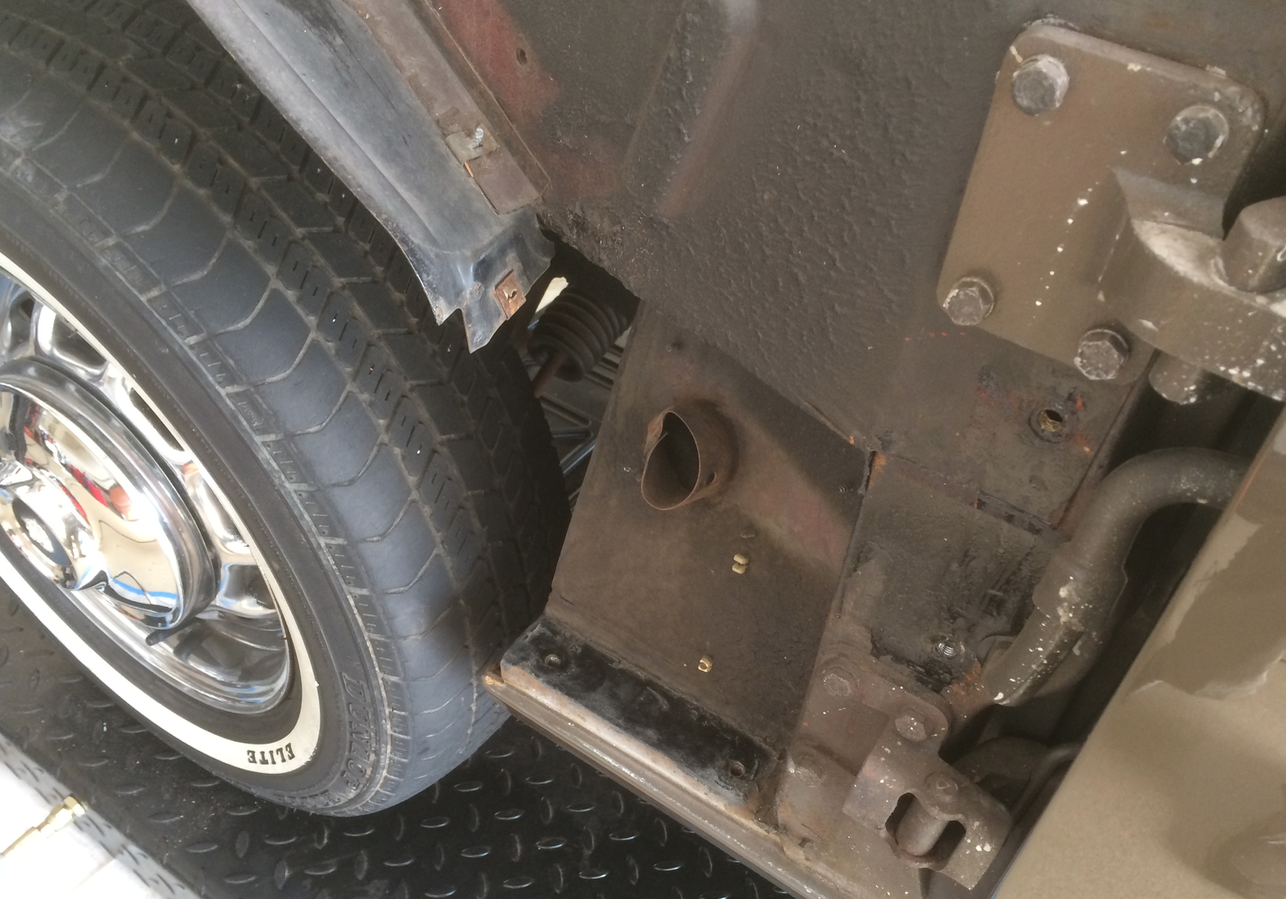
The XJ6 features bolt-on stone guards at the back of the front wheel wells that can easily be replaced if damaged or rusted. In our case, rust has eaten through the lower right side guard; both sides were replaced since the repair is easy with no need for welding.


