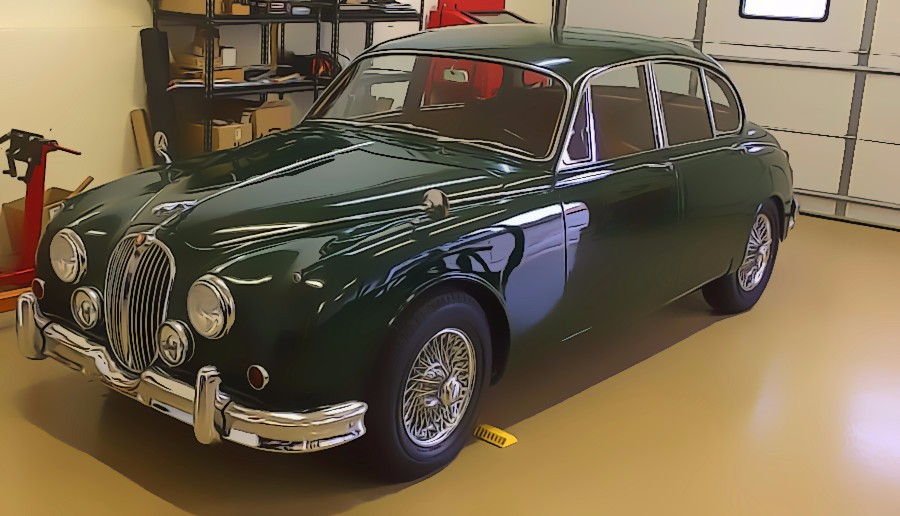
Most of the body shell metal work is complete, and the entire exterior has been painted with a sandable primer. The primer makes it easier to work out small imperfections. The right front of the shell had the most damage, quite obvious after blasting. Now the sheet metal is smoothed......
Body shell
Body work, part 3
See also Body work, part 1, Body work, part 2, and Post-blast body assessment. The work on the body shell is nearly complete, and the entire shell, inside and out, will be primed shortly. Only the undercarriage will be left untreated; this will be painted with POR 15....
Bonnet trim and latch
See also earlier post about bonnet removal. To complete work on the body shell before its primer and base coat, the front bonnet must be prepared as well. That means removing some trim and other attachments that were left on the bonnet when it was lifted on its hinges. The......
Body work, part 2
See also Body work, part 1 and Post-blast body assessment. As described in this post, the panhard rod brace will be strengthened following the advice of a 1963 Jaguar service bulletin. A triangular piece, fabricated to fit the wedge-shaped above the circular mount, will be welded in along the frame......
Body work, part 1
See also Post-blast body assessment. Metal dolly work on the right front of the Jaguar body has straightened out most of the asymmetry. The yellow bondo smoothes out what can’t be fixed with sheet metal hammers. The trailing edges of both left and right wheel wells have also be patched......
Post-blast body assessment
The Jaguar shell has been transported to Beaver Brook Restoration for a complete body and paint restoration. With the body shell blasted down to raw metal, the true history of the Jaguar is revealed. There was an obvious front collision with repairs to the right wing early on in its......
Blast update
In late August, LaFlamme Towing brought the Jaguar body up to Classic Car Blasting. The work is now nearly complete; the body looks terrific, especially for a 1961 car. Peeling back the layers, Virginia of Classic Car found old body work done on the right side front wing — probably......
Body shell reference photos
Here is a walk-around of the body shell after disassembly for reference purposes....
Tack strip revisited
The clean up before blasting requires the removal of all remaining non-metal pieces, including tack strips that were not taken out with the headliner, furflex, and trim. As shown the diagram above there are eight discrete pieces of tack strip on each side of the interior [lengths in brackets]: A)......
Body and suspension measurements
Body shell symmetry Since both the front and rear suspensions are now removed from the body shell, careful comparisons between the left and right sides of the body can be made that are independent of the suspension system (that is, caused only by the frame and body shell itself). The......