disassemble

No draught ventilator deconstruction

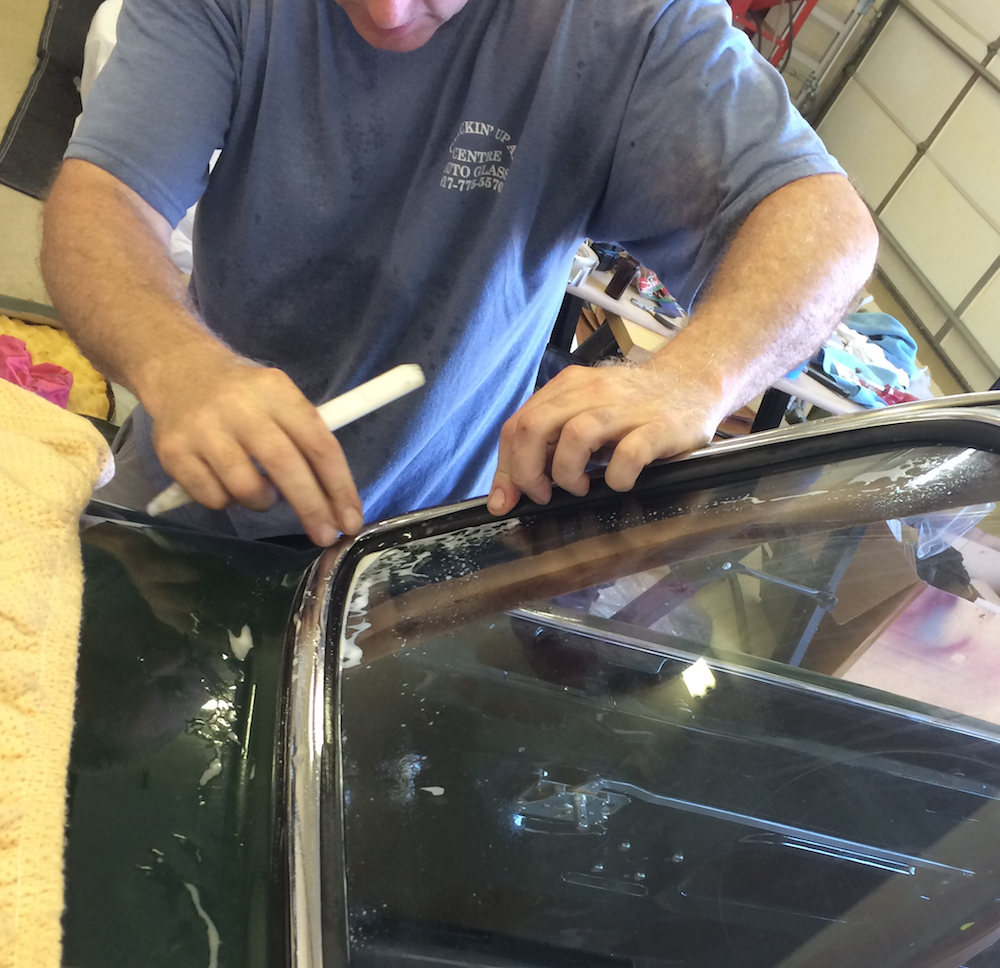
The front door features a comfortably effective triangle-shaped “no draught ventilator” that swivels open for fresh air. Since the ventilators have rubber parts that degrade over time, they need to be taken apart, a job that is delicate and somewhat difficult. The first task is to remove the ventilator from......

This content is for Full access 1 year and Full access 24 hours members only.
Register
Already a member? Log in here
Continue reading...

Bonnet trim and latch

See also earlier post about bonnet removal. To complete work on the body shell before its primer and base coat, the front bonnet must be prepared as well. That means removing some trim and other attachments that were left on the bonnet when it was lifted on its hinges. The......

This content is for Full access 1 year and Full access 24 hours members only.
Register
Already a member? Log in here
Continue reading...

Crankshaft front seal

Replacing the crankshaft front seal, housed between the oil pan and the front timing chain plate, is the most involved task of our planned engine restoration. The challenge is the multi-step process required to access the seal … once reached, actually replacing the seal itself is trivial. Damper hub After......

This content is for Full access 1 year and Full access 24 hours members only.
Register
Already a member? Log in here
Continue reading...

Inlet manifold removal, thermostat

The inlet manifold, an aluminum casting, communicates to the cylinder head through a series of passageways. Two carburetor mounts, with studs, are at the top. A separate water jacket connects to the main inlet manifold at four water ports. The water temperature sensor fits into a threaded hole in the......

This content is for Full access 1 year and Full access 24 hours members only.
Register
Already a member? Log in here
Continue reading...

Water pump removal

Our engine restoration plans include the replacement of the water pump located at the front of the engine block. We obtained a new unit from SNG Barratt. Once the bolts and stud nuts are removed, the water pump is easily pulled away from the timing chain cover at the front......

This content is for Full access 1 year and Full access 24 hours members only.
Register
Already a member? Log in here
Continue reading...

Crankshaft damper

See also overview of engine planning and Metalastik damper. Replacing the water pump requires the removal of the front pulley and crankshaft damper, a flywheel-like disc also known as a harmonic balancer. These parts are secured on the end of the crankshaft with a large bolt (1 5/16″ hex head)......

This content is for Full access 1 year and Full access 24 hours members only.
Register
Already a member? Log in here
Continue reading...

Engine-gearbox deconstruction

Reference ValveChatter Entry 52 – Bell housing bolt pattern The engine, gearbox, and overdrive unit were removed from the body as a single assembly – a long, awkward, and heavy collection of metal parts. So, the first restoration task is to break this assembly down into more workable pieces. Starter......

This content is for Full access 1 year and Full access 24 hours members only.
Register
Already a member? Log in here
Continue reading...

Disassembly milestone

Today marks the end of the disassembly and the beginning of the restoration phase phase of the project. A new RESTORATION menu has been added (see top navigation bar) . There is no clean demarcation between these phases since many components are still assembled (including the engine, gearbox, and overdrive!),......

This content is for Full access 1 year and Full access 24 hours members only.
Register
Already a member? Log in here
Continue reading...

Tack strip revisited

The clean up before blasting requires the removal of all remaining non-metal pieces, including tack strips that were not taken out with the headliner, furflex, and trim. As shown the diagram above there are eight discrete pieces of tack strip on each side of the interior [lengths in brackets]: A)......

This content is for Full access 1 year and Full access 24 hours members only.
Register
Already a member? Log in here
Continue reading...

Engine removal

With the body dolly attached to the frame, we continued to follow our plan of dropping the engine, gearbox, and overdrive to the floor, rather than lifting it up and out over the body shell. To do this, we first positioned the engine hoist so that its front legs were......

This content is for Full access 1 year and Full access 24 hours members only.
Register
Already a member? Log in here
Continue reading...